Showing posts with label astronomy. Show all posts

Wednesday, March 9, 2022

GPS check

I had a dentist appointment on the eighth of March, so I took a train and, while I waited at Arapahoe at Village Center station, I compared my GPS coordinates as measured by Google Maps and the Physics Toolbar app. Both are easy. To get the coordinates from Google Maps, you just set a pin on the map where you are...poke your screen at the spot and hold it there until the teardrop shaped pin appears. Then you can read your coordinates in the search bar. Here's what I got.

Physics Toolbox is just as easy. The menu button at the upper left gives you a list of options. Choose GPS and the screen gives you the data. Here's mine.

So what I have from Googles Maps is:
Latitude: 39.600337
Longitude: -104.888418
and from Physics Toolbox:
Latitude: 39.600331
Longitude: -104.888407

That's pretty close, but how does it work out in distance?

There's a formula that gives you the distance between two points, specified by global coordinates on the Earth's surface. In the Astronomy LabBook, it looks like this:

I have it saved in my MC50 Programmable Calculator app so I don't have to crunch the numbers from scratch and my data has the same number of significant digits, so I can punch them right into the calculator. What I get is 0.000024 kilometers. That's 0.024 meters or 2.4 centimeters. Assuming that Google Maps is accurate, Physics Toolbar's stated precision of ± 5.36 meters is pretty conservative. 

Of course, the precision changes according to atmospheric conditions and the number of satellites in range (here we have 20 satellites.) 

GPS is important in any field science. It's easy to note your position in a field notebook when you have a pair of accurate global coordinates, and you should. At each observation you should note your position (if you can't get your coordinates, describe your position as best you can by giving the position in respect to some named landmark) and the date and time.

The smartphone has become a great companion for the field scientist. I never leave home without mine.

Sunday, December 26, 2021

Years


If you've been following this blog, you'll have noticed that I've slowed considerably. The pandemic has had a lot to do with that, along with...aging, I guess. But I'm still on the trails.

This last picture is appropriate. It's the National Mining Museum in Leadville, Colorado. It should be on the bucket list of anyone interested in geology. Housed in a retired high school, it displays everything mining and mineralogy.

A close friend wanted to drive to Vale to hike around this picture postcard tarn...

Despite two feet of snow, we finished early and decided to go into Leadville. Glacial topography and mining...a perfect lead-in to next year when I will segue from physics and astronomy to chemistry and geology, mostly geology because the Denver area is a geotourists dream.

I won't be leaving physics and astronomy behind. I'll keep working on the LabBooks, but my trail adventures will carry me from the margins of the Rockies into the mountains.

I'll be focusing on my back yard and I invite you to join me in exploring your own back yard. You might be surprised by what you find there.

And, as always, I wish for you a greater future than any that has gone before.

Monday, September 6, 2021

Three shades of twilight

It's hard to pinpoint when twilight - dawn and dusk - begins or ends. If I hike to the top of the hill, right around where I stop in at Milano's Coffee for a milkshake, I can see the horizon out on the plains and, as soon as the center of the sun clears the horizon, that's the end of twilight. But dawn begins as a gradual lightening of the skies.

I can't see the geographic horizon to the west since the massive mount Evans blocks my view, so I have no visual indication of when dusk begins or ends. 

Astronomers can be much more precise. There are three stages of twilight. Say that you are on a hike along a trail and you expect it to turn into a night hike. You will notice that, even after the sun has set, you will have some time before you have problems seeing what's around you. That's called "civil twilight." Astronomers peg it from the time the center of the sun drops below the horizon to when it is 6° below the horizon.

As you continue to walk, you can still see pretty much where you're going but it's harder to see objects at the side of the trail. And you can see some of the brighter stars. This is the time of "nautical twilight". This was prime time for ancient mariners because they could see both the horizon and navigational stars like Polaris and navigation was easy. For astronomers, nautical twilight is the period when the center of the sun is from 6° below the horizon to when it is 12° below the horizon.

Pretty soon, you have to pull out your flashlight to see where you're going. Keep the red light mode on so you don't destroy your night vision. There's still a little light but the stars are beginning to really put on a show. You might see tiny stars shining back at you from the undergrowth, eyes reflecting your light back at you. This is "astronomical twilight" when the center of the sun is from 12° to 18° below the horizon. After that is night proper until the sequence reverses in the east with the beginning of dawn.

You can pinpoint the three stages of dawn and dusk by pulling up the Time and Date website:

https://www.timeanddate.com/

and type the name of the nearest town into the search bar at the top of the home page. You'll get a lot of information including a link entitled "Show more twilight and moon phase information". It will take you to a page that gives you all the times of day (and night, and all the twilights.)

Between day and night is a band of half-light, called the "terminator", that moves across the globe as the Earth rotates. If you have Google Earth, you can see it. There's a button in the toolbar at the top labeled something like "Show sunlight on the landscape."

How broad is the band? That varies according to the time of year and your latitude, but with those two pieces of information, you can calculate it. Start by figuring out how long your twilight lasts from the times at Time and Date. You can get your latitude from Google maps or Google Earth, or by finding your location in Wikipedia. If it has an article, it will tell you the geographic coordinates. You will want the degrees latitude as a decimal fraction (instead of degrees, minutes, and seconds).

You can figure out the circumference of the circle around the Earth at your latitude using the following equation:

c=2πR(cos l)

where R is the radius of Earth (6371 km or 3959 mi.) and l is your degrees latitude. You know that there are 360° in a circle, and you know (or now know) that it takes one hour for the Earth to rotate 15°. Can you figure out how broad the terminator is in kilometers or miles?

Give it a try, and while you're on your night hike, take in the beauty of the sky and trail, but watch your step!

Thursday, August 19, 2021

When you can't see the stars...

Astronomy is a sometime thing (apologies to George Gershwin). Light pollution, haze, clouds, so many things can sabotage a night of stargazing, so what do you do when you want to see a star but can't.

Well, study the thing that blocks your view. I've been impressed with how well phone cameras can perform after the sun goes down. For instance, sunset doesn't necessarily end when the sun goes down. The sun may have set on you but the clouds above you are still in line if sight of a low, red sun.

Here are some low clouds over Centennial, Colorado about half an hour after sunset. 

Recently, we've been having some very uncharacteristic thunderstorms in the area. It's difficult to impossible to capture a lightning strike in a photograph, but a video is a different thing entirely.


Fog, smog, clouds are all interesting in their own light and they show a different face at night than they do during daylight.

Tuesday, July 20, 2021

The Foundation

That's what physics is...the foundation of science. It's at the bottom of every material and energetic process in the universe from the exotic heart of a supermassive black hole, to your car's engine, to your own metabolism. So, physics is important.

I still plan to shift my focus to chemistry and geology next year. I'm really looking forward to exploring the spectacular geology in my area. But I don't want to drop physics and astronomy, so I will continue working on the physics and astronomy LabBooks.

It will be awhile before I've finished the introductory section of the Astronomy LabBook but I've completed the first two brief, introductory sheets of the Physics LabBook and an indepth exploration of measurement, precision, points, graphing, and geometry with lots of hands on excursions. You can find it here:


The first few sheets will be concerned with the fundamental measurements and methods that physicists use to explore the world. I make sure to bring it home to do it yourself projects and survival techniques.

Like the other LabBooks, this one is a LibreOffice spreadsheet, so download and install the free LibreOffice suite before trying to view it.

Wednesday, May 19, 2021

Catch the sun

You've probably read that you can't look directly at the sun without damaging your eyes. At an approximation, take that as a fact.

It's not exactly true, though. You can actually look at the sun briefly without burning a hole in your retina. A little longer and you will temporarily wipe out the part of your retinas that the image of the sun fell on. Longer than that and that part of your retina will be permanently out of operation. 

The problem is that everyone is different. If someone tells you that they looked at the sun for three seconds without lasting effects, your eyes might be able to take only one second. And that is why I suggest that you never look directly at the sun.

Your vision is precious. Don't risk it.

The image of the sun on the light sensitive part of your camera will also destroy it in a very short time.

But there are ways to observe the sun. You can get a blurry image with little cost. It's acceptable for viewing solar eclipses but not for detailed solar observation. For that, you will have to put out some cash.

I only do the inexpensive stuff here. This is my solar observation tool kit.

The most common means of viewing the sun is with a pinhole. That's what the silver rectangle is. I cut a small square out of two pieces of card stock (index cards are perfect, and folded a piece of light weight aluminum foil over one side. In the middle of the square hole, I used a pin to punch a tiny hole in the foil. To punch the hole, I placed the foil side down on a hard surface (I used a craft cutting board but a marble table top or similar surface will work fine) and pressed a pin point against it.

Holding the pinhole over another card and using it to project the sun's image, I got the following.

It's...uh, that tiny dot in the center of the black circle...you might have to enlarge the photo. You can move the pinhole nearer and further from the card. When you move it away, the dot gets bigger. The problem is that it also gets dimmer.

A large hole will provide a larger image but it will be dimmer and fuzzier. The main problem is that light from the surrounding area will wash out any details.

I have two inexpensive (but very cool) science kits that include pinhole projects. The white box is from the ScienceWiz: Light kit. I cut a hole, about a half centimeter, into one wall of the box opposite the side that isn't there (the box only has five sides. The missing side has been replaced with wax paper.) When I aim the pinhole at the sun, the sun's image is cast onto the wax paper. The box shields the image from glare.

The hole wasn't very round so the image came out sorta whompsided. A paper punch would have given me better results. But, if you do this project, don't expect to see a lot of details. The big hole is better suited as a pinhole camera for landscapes.

I got a much nicer image by replacing the lenses from a simple refractor telescope kit (the Project STAR telescope bought from Home Science Tools) with a foil pinhole (I punched a pushpin completely through the foil to create a larger pinhole) at one end and wax paper at the other (the kit instructions tell how to build the pinhole tube). 

With a pinhole tube, you can slide the telescoping cardboard tubes in or out to sharpen the image.

You can also use telescoping mailer tubes to create a pinhole tube.

A second way to inexpensively look at the sun is to use a #14 welder filter. It cuts out more than 99% of the sun's light. Eclipse glasses (which are really inexpensive) do much the same thing. Old science kits suggest that you use a candle to coat one side of a microscope slide with soot to create a solar filter. The problem is that it's very easy to scratch away a tiny section of soot and that's all the sunlight you need to blast your retina or a camera CCD into oblivion...not a good idea.


The second photo is zoomed. Zooming with a digital camera won't give you any more details but it will make the image larger (and fuzzier).

The pinhole phenomenon produces an interesting effect during an eclipse as spaces between leaves on trees act as pinholes to cast images of the sun onto the ground.


These methods will give you great images of an eclipse. (See the blog for August 21, 2017 for images of the last total eclipse in Colorado.) For observing the sun in detail, you need something that will either project a cool image (a lens will just start fires), or a special filter. You can buy a special telescope called a sunspotter for a little over a hundred dollars. With it, you can see sunspots and flares.

You can use a sun filter (or welder filter) with a scope but the filter has to go over the objective lens and it has to cover the objective completely. You can get a sun filter for most telescopes and some binoculars. Here's my Carson telephoto lens on my smartphone with a #14 welder filter between it and the sun.

Here, you can see the sun's corona. The bubble at the upper right of the image is an artifact, but you can just see a solar flare below it. This is about the best I can do with my set up. Any sunspots would be masked by the general brilliance of the sun's image.

You can project the image if the sun through a scope but keep in mind that things (the scope's optics, the surface you project onto, whatever's under that...) will quickly heat up.

If you want to seriously get into solar observation, the sunspotter telescope is one way to go.

Another is an H alpha filter. It filters out all light except a very narrow band from the hydrogen spectrum (thus, it's name). It's expensive but it will show you incredible solar details. It will also block light pollution in urban settings.

Professional astronomers use radio, ultraviolet, and infrared telescopes (in addition to their regular telescopes) to get their solar images. For a lot of cool images of our hot sun, check out Wikipedia (https://en.m.wikipedia.org/wiki/Sun).

As a curious astronomy observer, you don't have to spend a lot of money to watch space and most of the inexpensive pieces of equipment are also very portable so you can easily carry them on the trail. With a little more money, you can turn astronomy into a hobby that can grow to any level.

The sun is a fascinating object to track but be safe and enjoy it.


Saturday, November 21, 2020

Do you know your north?

Heh. In the Denver area, that's easy.

That's west. (See the Rockies?)


That's east. No mountains. In fact, when you top that hill, it's plains as far as you can see...all the way to the Mississippi River, 600 miles away. They don't call the Great Plains "Great" for nothing.


Facing the Rockies, north is to your right.

But why should you care?

Let's say that you're hiking somewhere other than Denver and you suddenly realize that you don't know where you are? Even if you have a map, you have to orient the map to your surroundings and the way you do that is to point north on your map (there will be a symbol pointing north just for that reason) toward geographic north.

You could just choose a direction and start walking. Surely a straight line will bring you to a road or stream or something you can follow out.

The problem there is that humans are very bad at walking in straight lines. They're much better at circles. People have a dominant side. If they're right handed, their stronger right side tends to push them to the left.

The way to walk in a straight line is to find a landmark and walk to it. When you get there, sight back to where you came from and extend that line of sight in the direction you're going, find another landmark, and walk there. Repeat.

But it's best if you have some idea of where you're going. Do you remember a road to the east of you? Is there a town somewhere to the southwest? Your reference is north.

When you face north, east is to your right, west is to your left, and south is behind you. And the sky will always tell you where north is. 

At night, Polaris, the pole star is due north (actually, it is off by about a degree but it's good enough for navigating on land.) If you know any objects in the sky, you should know Polaris, the Big Dipper, and Orion. The Big Dipper is hard to miss because it looks very much like a...well, big dipper. The two stars in the outer edge of the dipper are called the "pointer stars" because they point straight up at Polaris.

(South of the equator, Polaris australia is a very dim star, so you have to find where it should be by following the upright of the Southern Cross.)

If you find Polaris, you've found north so just walk straight toward...oh, wait, it's night. You shouldn't be walking around in a strange forest at night. Just wait until morning and, okay, where was Polaris, again?

Well, look for moss on a tree.

Eh, that's not a reliable way to find north. Moss likes sunshine and most of the sun in the Northern Hemisphere comes in from the South so, yes, mosses like southern exposures but they grow where they can. In dense forests, you can't trust them.

So, here's one.

Set up a vertical post (what astronomers call a "gnomon" - a rod used to cast a shadow or sight some object) and, at the top of its shadow, drive another rod into the ground. In about an hour, come back and place another rod at the tip of the gnomon's shadow (it will have moved). Strike a line from the gnomon halfway between the other two rods - that points north. A line from the second rod to the third points east.

The idea is that the sun rises in the east and sets in the west, and in the northern hemisphere, the sun is to the South, so the sun's shadow points north and moves from west to east. The problem is that this method depends on when you mark the shadows.


In the picture above, a line drawn from the rod at the left to the nearest rod points due north because I placed them at solar noon (not at Daylight Savings Time noon). At solar noon the sun is due South.

If you place the rods an equal time before and after noon, this method works.

Don't know what time it is? Well, start before noon and place small markers every so often at the ends of the gnomon shadow - maybe use little rocks or stick small twigs in the ground. Where the end of the shadow is closest to the gnomon - that's solar noon. Draw a line from the gnomon to that point and you have north.

If you spend a lot of time outdoors and pay attention to where the sun is, you can get to where you can just look at the sun and tell about what time it is and where north is.

Keep in mind that, in the Southern Hemisphere, you have to look for where the southern pole star would be if you could see it, and the sun will be in the north during the day.

Monday, November 9, 2020

A universal sundial

A world globe can be used as a sundial that can tell you the time of day anywhere on Earth, time of sunrise and sunset, how the seasons work, and many other things. All you have to do is orient it in the same direction relative to the sun as the Earth. That way, it models Earth in space. Here's how you do it.

You will need a surface that can be tilted (and, possibly a clamp for the base of the globe to keep it from tilting over. Alternately, there are globes that can be tilted in respect to the base.) You will also need a mini-gnomon. A gnomon is just a vertical rod that will cast a shadow in the sun. It has to be small enough to position on the globe's surface. I used a plastic bottle cap and drove a screw through the center from underneath. (The screw should be as near a right angle to the surface of the cap as you can make it. You can test it with a carpenter's angle or even the sides of a sheet of paper.) After using a carpenter's level, or a phone app level to level the surface you will place the globe on, place the cap on the surface and mark the edge at the point north of the screw. Use a magnetic compass or a phone app but don't forget to look up the correction for true north from where you live and add or subtract it from your compass bearing. (Do an Internet search for "magnetic declination".)

With the line between the screw and the edge mark pointing north, make another mark with an erasable marker at the end of the screw's shadow from the sun.


Now, set your globe on the surface with the north pole pointing north (according to your compass with the correction to true north.). Rotate the globe until your position is on top.


Now for the fine tuning. Place the mini-gnomon pointing north directly over your position on the globe. If the sun's shadow on the globe and the sun's shadow on the Earth are oriented the same, they will both be oriented the same in space in respect to the sun, so tilt and rotate your globe until the tip of the screw's shadow touches the mark you made earlier at the shadow's tip. Your globe is now aligned.


What time is it? One way to tell is to watch your mini-gnomon to see when it's shadow is shortest - that's solar noon. During daylight savings, the local time will be an hour behind solar noon.

You can find where on the globe that it's solar noon by moving the mini-gnomon around to find the place where it's shadow is shortest. That will be a line of longitude. Knowing that every 15 degrees of longitude is an hour will allow you to calculate the time anywhere on Earth (at least, while the sun is out.)

You may have heard that the sun is directly overhead on the equator at noon each day. Try it out.

When it's solar noon where you are, place the mini-gnomon directly over your position and slide it straight down your line of longitude to the equator. Does the screw cast a shadow? Not if it's one of the two annual equinoxes. On any other day, the sun will be exactly overhead somewhere north or south of the equator.


You can easily see where sunset and sunrise is by finding the day-night divider line on your globe.


At my current time, here, sunset is slowly creeping off Africa into the Atlantic.

There is a lot you can do with the universal sundial. Can you use a thermometer to measure differences in temperature on the surface of your globe according to the angle the sun is shining on it? That's what causes the seasons.

Once you have a globe oriented, you can use a clamp or clay or some other way to freeze it in position and make a cover to keep it out of the weather. Then you can use it all year.

Thursday, July 23, 2020

What about that sky color?

There are a couple of hints as to why the sky is blue that are easy to obtain.

First, look straight up through a polarized sunglasses lens. Rotate the lens and see what happens. You'll see it lighten and darken. Second, note that the sky is not always blue. There's a definite sequence of colors as the day progresses: reds and oranges, yellows, blues, then the reverse.

What polarizes light? Reflection! When light bounces off something, it comes off organized. That's what causes glare and glare is why there are polarized sunglasses to start with.

Light is sorta complicated and maybe you don't want the excruciating details, but, at base, it's a wave (like ocean waves) made up of electric and magnetic fields. The fields move at right angles to each other. The waves can be oriented in any direction and they are when they leave the sun.

But when light hits a surface, whether it's a molecule or a lake, it's absorbed by the atoms in the surface. Some of the atoms send out light when they calm down, sometimes in a different color but often unchanged. Different materials are better at this than others. That's why metals reflect better than glass.

But the gas molecules in the atmosphere absorb and re-emit sunlight and the light they re-emit is polarized. Although molecules tend to be neutrally charged overall, most of them have different charges in different places. Remember that like charges repel so molecules next to each other tend to drive each other's electrons away from each other. So molecules tend to organize themselves. I say "tend to" because it's not a strong phenomenon and not all the molecules in air are lined up like a high school marching band. But light coming off these molecules also tends to be lined up. It's called Rayleigh scattering.

Here's a shot of the sky through a polarizing filter.


After turning the filter ninety degrees, it looks like this.


Notice the gradation of light toward the sun. There is another kind of scattering in the atmosphere. Mie scattering is from larger particles: dust and other aerosols like water droplets. A big difference between Mie and Rayleigh scattering is that Rayleigh scattering is affected by light wavelengths. The shorter wavelengths (violet, indigo, blue) are scattered more than the longer wavelengths (red, orange, yellow). Mie scattering disperses all the colors about the same. 

Space is black and the sun is almost white. As sunlight comes into our atmosphere, ultraviolet (eaten up largely by ozone in the upper atmosphere), violet, and indigo goes first. What reaches us is blue. As a spot on the Earth rotates away from the sun, light has to travel through more atmosphere to reach it. Green drops out, but you can't see much green since it's still mixed with a lot of blue. Yellow drops out, and then you get the oranges and reds of the sunset.

Keep in mind that the same sun creating beautiful sunsets over the Rockies is creating a blue California sky at the same time.
The sky closer to the sun looks whiter due to Mie scattering. So that's why the sky looks blue...and white and orange and red…

So, using color filters.

Filters have a coding system that looks rather arcane. I mentioned it in the last blog. The filter I used was a CTO ¼ 6500 to 4500 K ½ f/stop gel correction filter.

CTO stands for "color temperature orange". There are also CTB (color temperature blue) and "plus green" or "minus green" filters. CTB filters are specifically there to make tungsten light look like sunlight. They "cool down" yellowish light. CTB does the opposite. I wanted to take blue out of my picture so I needed a warmer filter. ¼ is just the strength of the color change. ¼ is a light colored filter.

The K number is color temperature. All bodies above absolute zero have molecules that vibrate - that's what heat is - vibrating molecules. And if molecules are vibrating, so are the charges within them. Moving charges are what causes magnetic fields. Moving magnetic fields create electric fields and when magnetic and electric fields start moving together, you get electromagnetic fields - light.

Relatively cool bodies like a summer sidewalk (see my blog for Friday, August 30, 2019, "Trail temperature vs. air temperature") might seem hot, but they're not hot enough to glow. But they are giving off light in the invisible, infrared range.  Infrared light is how heat is radiated because when infrared light hits matter, the matter heats up. 

As objects get hotter, they begin to glow a dull red, then orange, then yellow, then blue, and then they go white. The K number in filters stands for "Kelvin" as in "Lord Kelvin" after whom the Kelvin temperature scale, preferred by scientists, is named. The K number is the color that most closely resembles the color given off by a hot body around that temperature. A hot body from 6500 K to 4500 K will give off a yellow color. Larger numbers denote bluer colors, smaller numbers mean redder colors.

The f/stop is how much light the filter lets through. On a camera, the f-stop is the ratio of the lens' focal length to the diameter of the aperture. That might sound complicated but remember that the camera's focal length is related to its light gathering power and the larger the aperture, the more light can get in, so the smaller the f/stop number, the larger the aperture, and the more light is passed through.

An f/stop of ½ does not mean that half the light gets through. It's actually a very light filter that lets a lot of light through. An f/stop of, say, 8 would be much darker.

Correction or compensation filters tend to be pretty light. There are also color filters that are intended to really alter the color of photographs for special effects. They cut out a lot more light in specific colors. There are also neutral filters that just cut light in all wavelengths, polarizing filters, and special effects filters like diffraction gratings that give you rainbows.

Some photographic filters are made of glass or thick plastic. Gels are thin plastic films. I like them because they're inexpensive but they do the job and the thicker filters are harder to mount on my cell phone. I just slip the gel between my camera lens and the phone case and I'm ready to go.

The sky is what you have to look through to do astronomy so, if you're interested in sky watching, it behooves you to understand the weather.

Monday, May 18, 2020

Earth's specs

Somewhen in the 200s BC, a Greek named Eratosthenes measured the circumference of the Earth. He worked and lived in Alexandria, Egypt and knew of a place in Syrene, Egypt where, on the summer solstice, the image of the sun could be seen in a deep well, meaning that the sun was directly overhead. That placed Syrene on the equator. 

Eratosthenes assumed the Earth to be a sphere. If that were true, he reasoned that, if he stuck a rod in the ground vertically, it's line could be extended straight to the Earth's center to form an angle with a similar line from Syrene and that angle could easily be calculated. All he had to do was measure the angle formed of the line from the tip of the sun's shadow to the tip of the rod with the ground, subtract that from the 90° angle of the vertical rod with the ground, and he would have it...and "it" would also be Alexandria's latitude. It worked out to be about 7°.

By that time, everybody knew that the Earth was round and that the angular measure of any circle was 360°, and Eratosthenes knew that Alexandria was 5000 stadia from Syrene, he could figure out the circumference of a great circle on the Earth and, therefore, the Earth. His result was 250,000 stadia, or 39,385 kilometers, which is 1.4% off from the accurate circumference, 39,941 kilometers. Not too shabby!

So, on my recent hike to The Bluffs, I decided to do a modernized version of Eratosthenes' calculation.

The summer solstice was still a ways in the future so, not trusting nature to provide me with a good shot of the sun on demand, I measured the latitude and the distance between Arapahoe and Ridgegate Stations on the RTC southern light rail lines. I used Veiyra Software's Physics Toolbox Pro for the measurements. Here are the readouts.

Arapahoe Station

Ridgegate Station.

The distance, measured as the crow flies using Google Maps, is 5.6 miles or 9 kilometers.

"As the crow flies" is another way of saying "along a great circle on the globe," so I now have a way of converting degrees along the circumference of the Earth to kilometers and vice versa. By the way, I have it from a reputable source, namely, a crow, that crows do not always fly in straight lines.

The two stations are at almost the same longitude, so I can ignore that. The difference in latitude is .08 degrees.

But what about the stick in the ground? Well, that's another thing. It's called a gnomon and was a primary tool of ancient astronomers. It simply measured the angle of inclination of an astronomical object. Today we have astrolabes (basically a protractor with a plumb bob and a pointer) and the more advanced theodolite used by surveyors. I have a theodolite on my phone, the Dioptra app by Workshop512.

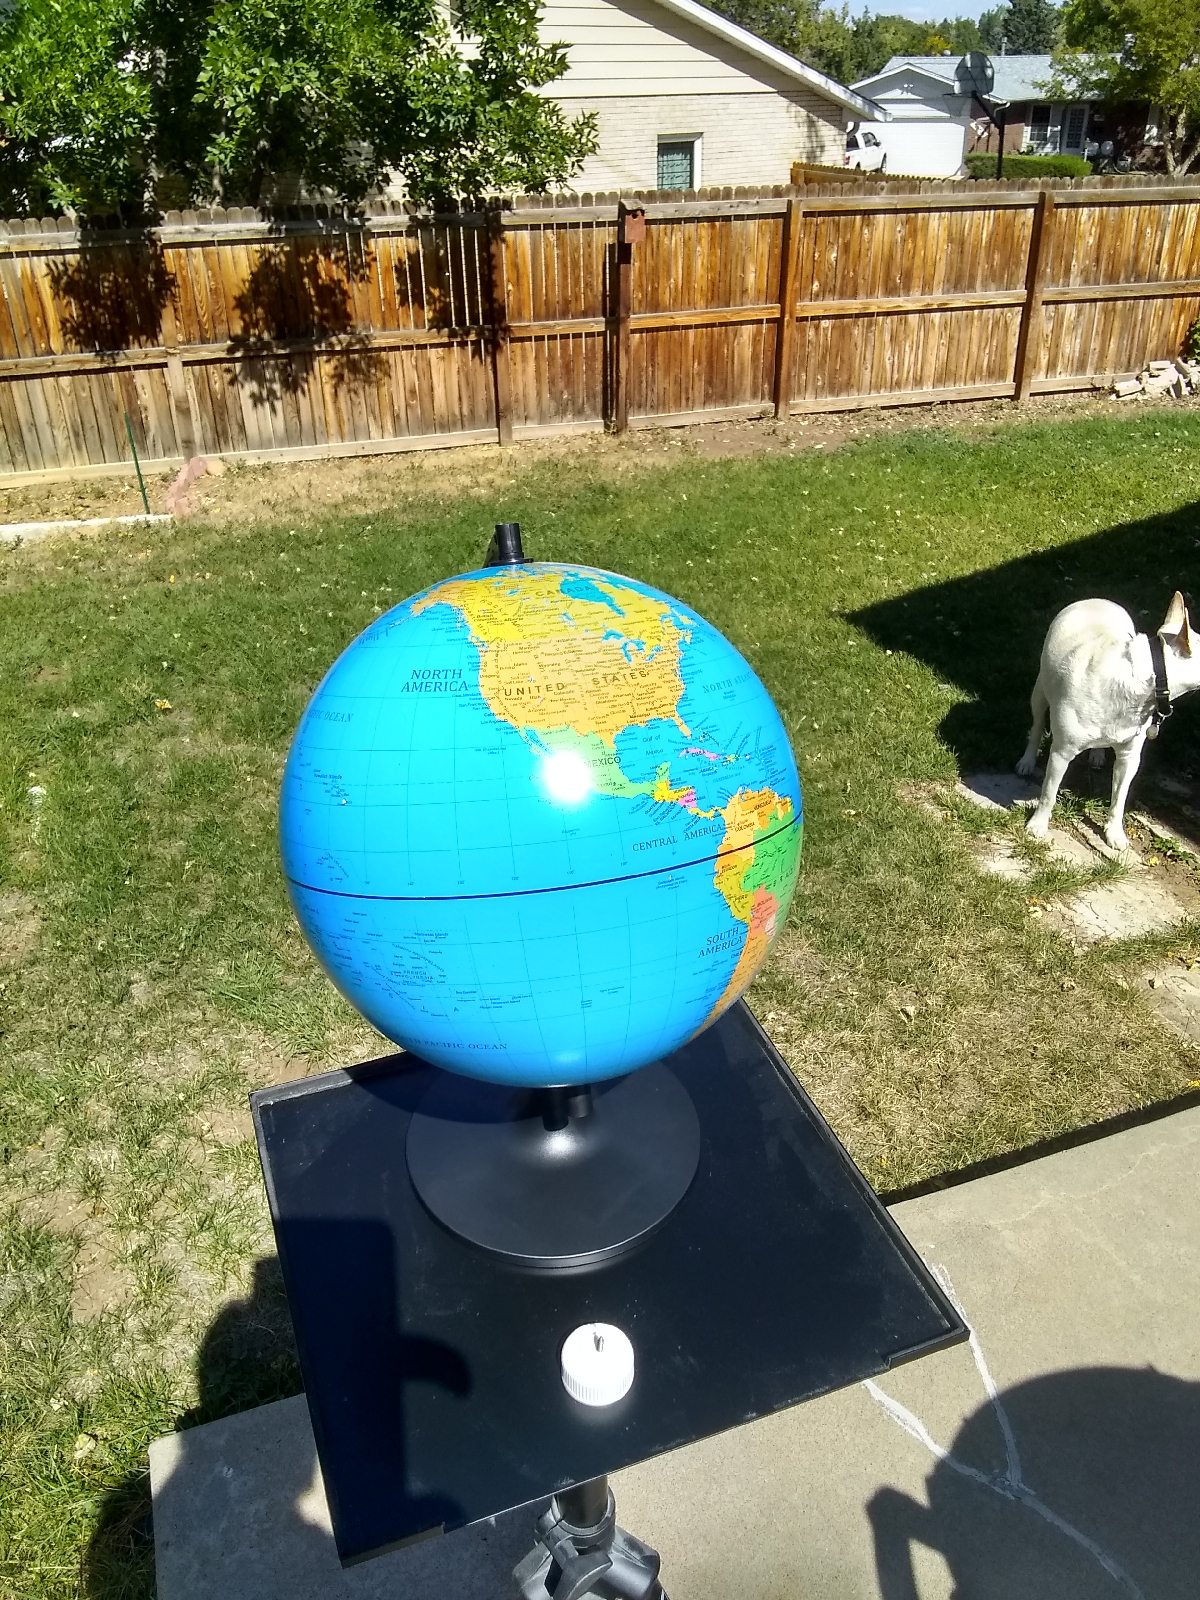
Since I really had all the information I needed, and I didn't know how far I was from the equator, I just wanted to do a modern version of Eratosthenes' trick to find my latitude by the sun. True to course, it was so cloudy on the summer equinox that I couldn't even tell which quadrant of the sky the sun was in, but I slapped a welder filter on my phone and took this shot from Dioptra the next day.


The angle of inclination was 51.1°, which was close to the actual measure on the equinox taken from the Time and Date website:


Solar noon was at 1:07.

Angle of inclination was 50.5°, which placed my latitude at 90°-50.5°=39.5° . Looking at the Toolbox measurements above, I'm off by less than a tenth of a degree. The Dioptra measurement, which is also GPS is 39.58, so it's close.

But back to the real thing. The difference in measured latitude was 0.08° which is 4 minutes and 48 seconds (There are 60 minutes in a degree and 60 seconds in a minute). If 0.08 degrees is the same as 9 kilometers, 1 degree is 112.5 kilometers.

Okay, breath held, the moment of truth….112.5 kilometers times 360 degrees is 40,500 kilometers. The actual value is 39,941 kilometers. I was off by 1.01% Wow! I just impressed myself!

Of course, along with all the measurement error and such, the Earth is only approximately a sphere. The radius at the equator is larger than the radiuses at the poles.

We know the circumference of the Earth. The approximate volume is easy. The volume of a sphere is π\6 times the diameter cubed. The diameter is the circumference divided by π. Working backward, the diameter is 12,714 kilometers. So the volume is right at 10 to the 12th power cubic kilometers.

Okay, mass...mass is a bear. You measure mass with a balance and standard mass (remember the blog about mass and weight?) But Earth does have a mass. How in Sam Hill would you figure it out?

Well, obviously, you can't use a balance so any measurement has to be indirect. The first measurement to within 1% was made in 1798 by Henry Cavendish as a spin off of his accurate measurement of the gravitational constant. He used a torsion balance to do that and I can't even approach that kind of precision at home, so I'll just tell you how he did it. 

Isaac Newton figured out that the force of attraction (gravity) between any  two masses is directly proportional to the difference between their masses, and inversely proportional to the square of the distance between them. But to come up with an actual measurement, a proportionality constant was needed. He called it the Universal Gravitational Constant and never found it's value.

About 70 years later, Cavendish did it. Imagine a long, vertical, thin, flexible rod. At the bottom end is another rod forming an inverted T. At the end of that rod are two balanced heavy masses. His masses were  .73 kilograms each. He could set the bottom rod spinning back and forth and measure a slight force inhibiting the motion by comparing the frequency of oscillation with and without the force. The force, of course, would be another large mass close to one of the chunks of lead on the torsion balance. He knew the masses he was working with, the separation between them, and Newton's formula, so he was ready to calculate the Universal Gravitational Constant.

It was 6.67408 x 10^-11 m^3kg^-1s^-2 .

Believe it or not, that's what we need to calculate the mass of the Earth. Using Newton's formula we need the acceleration due to gravity (we found that approximately fooling around with the smartphone's accelerometer), multiplied by the radius of the Earth squared (we know that), divided by the Gravitational Constant.

So let's do it. Square the Earth first. The diameter is 12714 km so the radius is 6357 km. We need that in meters so 6357 x 10^3 meters. Square that to get 4.04 x 10^13 meters squared. The acceleration due to gravity is 9.18 meters per second square so the numerator is 3.71 x 10^14. Now we divide that by our Gravitational Constant, 6.67408 x 10^-11 m^3kg^-1s^-2  to get 5.56 x 10^24 kg (the accurate figure is 5.972 x 10^24 kg).

Actually, Cavendish didn't report the mass of the Earth. He stopped one step short by publishing the density of Earth which was 5.45 grams per cubic centimeter. He probably figured that, from there, it was easy to multiply that times the volume of Earth so, eh, let someone else do the easy part. 

If we look around and figure out what proportion of Earth is made of light rocks, heavy rocks, water, air... and come up with an average density we would say that it's around (and people before Cavendish had done just that) 2.7 grams per cubic centimeter, so where does all that mass come from?

Well, obviously, there's more underneath our feet than meets the eye. In fact, the deepest we've ever been is 12,262 meters and, although that's pretty deep, it barely scratches the surface. Still, the researchers expected temperatures around 212 degrees Fahrenheit and what they got was 356 degrees. It's hot down there.

But two things convince us that the core of the Earth is iron-rich molten metal. One is the surprising density of Earth. The other is something you don't see a lot of in the solar system...magnetism.

Earth is a magnet. The sun and gas giants like Jupiter and Neptune have strong magnetic fields. Mercury has a weak field. Some of the moons (but not ours) seem to be magnetic, but most of the smaller planets are magnetically inert.

We've used compasses that rely on the Earth's magnetic field for a long time. It wasn't until 1600 that William Gilbert proposed that Earth is a magnet. In fact, Earth is not a permanent magnet. It's an electromagnet.

Moving electrons (current) generates magnetic fields and our rotating molten metal outer core is one humongous magnetic field generator.

Our planet is special. We are just the right size. If we were too big, gravity would squash us. Too small and we wouldn't have enough gravity to hold onto our atmosphere. We get just enough sunlight for a healthy biosphere. We have plenty of that rare commodity - water. A nice balance of plants and animals conditions our air. And we have an effective magnetic shield that shunts dangerous solar radiations around the planet and out into space.

When I bought my current phone, I made sure it had a magnetometer in addition to the other regular sensors. Phones with GPS receivers will provide fairly accurate compass readings, but a magnetometer is more accurate and you can use it to measure both magnetic fields and electrical currents.

My Android has a AK09918 triaxial magnetometer. Since it's triaxial, it measures field strength in three directions (like the accelerometers). There are two common kinds of magnetometers in smartphones: magnetoresistive and Hall Effect. The AKM is a Hall Effect sensor that uses a flat conductive plate. A magnetic field causes electrons to deviate from their path and polarizes the plate. That can be sensed as a potential difference across the plate.

About a week ago, I hiked down a mile of  Little Dry Creek trail and used the Physics Toolbox Pro to record magnetic fields. I walked almost due west so I was cutting across the magnetic field lines.

The strength of a magnetic field is measured in teslas (in this case, in microteslas). A tesla is equal to a weber per square meter, and a weber is a kilogram per square second. If you understand induction (it makes transformers work), webers involve how much voltage you can crank out with a magnetic field. So with microteslas, don't expect geomagnetic electric generating stations any time soon.

I recorded the magnetic field in three directions at a rate of one measurement per second. Since I had the phone in my shirt pocket, the x direction was right-left, y was up-down, and z was forward-backward. I then saved the several thousands readings in a csv (comma separated values) file that I could pick up with DANSYS, my statistical spreadsheet.

Here's a graph of the tracings.

The tracings are pretty fuzzy, indicating a lot of noise. The inside of a smartphone has lots of electrical components crowded together and heat from those and the outside. Noise is to be expected and when you're measuring on the order of micro-anything, you can expect noise to blur the lines. 

All the lines have big spikes but the z component has the most. That is my forward and backward direction and I was walking in an urban environment, so power lines, underground cables…. yeah. So that's not the Earth's magnetic field, right? 

Many scientists call this the anthropocene epoch because the biggest influence on the Earth's environment, for the first time, is a single species - humanity. Every stray magnetic field alters Earth's magnetic field locally. Have you ever tried to get a compass to work in a house? You're likely to find it somewhat off the magnetic north.

But, we can sense some trends. There is a noticeable difference between the start of my recording and the latter part. That's because I started at my home and walked a ways more or less north before turning west on the trail.

The green line gives us the total field strength. It's measuring around 50 to 75 microteslas. The normal background magnetic field strength runs around 25 to 65 microteslas, so we're well within that range (once we get away from the houses.) The local residue from residences doesn't seem to spread out very far. The trail is generally about 200 to 300 feet (as measured by Google Maps) from the nearest houses.

Geophysics is the study of the physical attributes of our planet. After the barriers between East and West came down in 1957, scientists took the opportunity to focus on Earth and instituted the International Geophysical Year. You can learn a lot more with a team than you can alone. Perhaps you can join with some interested neighbors and have a Geophysical Year of your own!

Tuesday, March 3, 2020

Earth in space 2

So, we know how long it takes Earth to rotate, that it's tilted in respect to the ecliptic, and the time it takes to travel around the sun. So how far is it from the sun?

Uhrmph...uh. Anybody got a meter stick?

Well, with some high powered telescopes and a lot of patience, we could measure the apparent distance between two stars and half a year later, on the opposite side of the sun, measure the same distance and see how much it's changed. 

Stars don't move in the sky in respect to us - not to any measurable extent, that's why they're called "fixed stars" - so any apparent motion would be due to what's called "parallax error". If you want to see parallax in action, get close to the wall on one side of an analog wall clock (the kind with hands) and read the time, then go to the other side against the wall. You'll get two different readings because you're viewing the hands of the clock from two different angles.

You can use the parallax method if you can measure very tiny angles, but the whole idea of this blog is to get by with little expense and portable equipment.

What to do?

Let's use math!

But first, the background. Back in the early 16th century, Nicholas Copernicus realized that astronomy would make much more sense if the sun were at the center of things instead of the Earth. Tycho Brahe didn't hold with Mr. Copernicus' new fangled ideas but he did have an eye for precision and cranked out a massive library of observations of the visible planets.

Johannes Kepler (born 1571), the hero of our story, did hold with Copernicus' new fangled ideas and needed his teacher, Tycho Brahe's data to prove it, but Brahe wouldn't give...until, on his deathbed, he bequeathed his library to Kepler. 

Kepler started working tirelessly on the data. It was hard for him to keep a job, and he moved from place to place. What he wanted was very pointedly something the powerful church of the time did not want, a heliocentric universe. After his benefactor, King Rudolph of Bohemia, abdicated his throne to his brother Matthias, things began to fall apart for the Kepler family, but Johannes continued working.

His way of understanding Earth in space was to, first, work out the motion of Mars from Brahe's observations. With his results, he applied them to the other visible planets to see if they worked the same way. When it was obvious that all the visible planets complied with his three laws (we talked about those in "Orbits"), he applied them to Earth. The third law is telling. It tells, in fact, how far the Earth orbits from the sun (at least, at its furthest point, and since the Earth's orbit is almost (not quite, but almost) circular, we'll go with that).

Kepler's third law says that the square of the orbital period (the time it takes a planet to orbit the sun) is proportional to the cube of the distance we want. The proportionality constant, it turns out, is equal to the sum of mass between the two bodies (the sun and the planet) multiplied by Newton's universal gravitational constant divided by 4 times pi squared (we had to wait for Newton to figure out the details). All together, the formula, 200 years in the making, is…

r is the distance we're looking for. T is the time it takes for us to travel around the sun, 365.25 days or 31,557,600 seconds. I convert to seconds because the almost-constant a, in SI units is 2.97x10⁻¹⁹ s2/m2. That's a rather messy looking value but remember that constants like that are mainly there to make your answer come out in the right units. I said that it's "almost constant" because it's actually a calculated value that includes the sum of the sun's mass and the mass of the object orbiting the sun. But objects in the solar system are so much smaller than the sun that their mass is negligible. The point is that the ratio of a planet's period of orbit squared to the maximum distance from the sun cubed is almost exactly the same for all the visible planets.

When I do the math, it puts us 149,675,423,264 meters or 93,003,996 miles from the sun at our maximum distance. The Wikipedia says an average of about 92 million miles and, since the Earth's elliptical orbit is almost circular, that's pretty close.

It's sorta exciting when calculations like this come out right. I used my statistical spreadsheet, DANSYS, to do the calculations but you could have done it with any spreadsheet, or even a calculator.

So, I'll see you next time and write about Florida (Station, that is) when we've moved a little further around the sun

Tuesday, February 25, 2020

Earth in space

We're on a rock whirling around the sun amid other rocks and space debris. It's a nice rock with water and plants and restaurants, but keep in mind that we're surrounded by vacuum and cold and, and space debris.

If you're sitting in your living room looking out your window, you can easily see the motion of that kid bicycling down the street, but what if you're in your car driving down the street. It's not so easy seeing your own motion 

We can see other planets and track their motions. Maybe we shouldn't be too incredulous about our ancestors that thought the Earth was the center of the universe and everything else whirled around Earth.

In a way, they were right. The whole Einsteinian revolution began with the idea that, in an inertial frame of reference it really doesn't matter whose point of view you take.

Hmmm...I'd better explain that "inertial frame of reference" thing. It's really important to modern physics. In an inertial frame of reference, everything is moving at a constant velocity. Different things might be moving at different velocities, but they're not speeding up, slowing down, or changing direction. It's "inertial" because the attribute of inertia is what causes matter to resist changes in velocity.

But Earth isn't in an inertial frame of reference, is it? It's in a circular orbit so it's constantly changing direction 

Well, yes, but it's orbit is huge and, if you look at one segment of it, the orbit looks like a straight line, so it's in an approximately inertial frame of reference locally.


So are we moving around the sun or is everything moving around us. Have you ever been in a vehicle and suddenly had the weird feeling that you and your vehicle was standing still and everything else was moving? You were having an Einsteinian moment.

So how do we choose? That's easy, we choose the most convenient option. Really! Yes! That's what physicists do. And it has proven very inconvenient to see everything as moving around us because if that were the case, Mars can be seen to spin its merry way around the sun, except when it decides to occasionally reverse course and go the opposite direction for a while before turning around and continuing it's journey in the right direction. Mars is a rock. It doesn't "decide".

If we're going around the sun like all the other planets, then we catch up with Mars, pass it and then watch it trail us. That makes a lot more sense.

But it's easy to watch Mars and see what it does, but how can we see what we're doing since it would be really hard for us to look back at us, what with all that vacuum, and cold, and lack of good restaurants.

Well, we have two options. We can watch what other planets are doing and assume that our planet works pretty much the same way, or we can watch what other planets' motions look like and figure out what our motion must be to make their motion look like that.

It's like a big puzzle, but all the pieces are there. We know, for instance, that the sun is in the same place in our sky about every 24 hours. Sunrise yesterday was at 6:49 am. Today it was at 6:48 am. Well, 23 hours, 59 minutes.

So we know that the Earth spins on its axis once every 23 hours and 59 minutes give or take a few seconds.

We also know that the sun takes 31,557,600 seconds (365.25 days of 86,400 seconds per day) for the sun to come back to the same place in the sky. That's how long it takes for the Earth to orbit around the sun.

Wait a minute (or about 60 seconds). How do we know that? Well, it's how we define a second, or how we used to define a second. Now we define a second as "the duration of 9,192,631,770 periods of the radiation corresponding to the transition between the two hyperfine levels of the ground state of the caesium-133 atom" according to Le Systeme international d'unites. Don't worry about it right now. I'm planning a whole blog or two on time later.

But how do I know when the sun is at the same place in the sky? Well, my analemma, of course! Here it is 


Do you see the figure 8?

Let me see if I can help.


I hate drawing on it. It took me a whole year to make it. It looks a little ragged but we moved in the middle of the year and I had to reorient it at the new place but I had the north-south bearing and level values, so it was close. If you want a clean one, a lot of big world globes have analemmas printed on them somewhere in the Pacific Ocean (the only place with enough room). Check your local library or geography classroom 

What I did was build a wooden block to sit astride our back fence. To the top, I tacked a sheet of paper and, in the middle, I drove a nail. On the first and thirtieth of each month (and a few other days), at 1:00 PM, I marked where the end of the shadow of the nail was. The pattern that formed is called an analemma. 

Our analemma looks different than an analemma in Alabama, where I used to live. I was surprised, when I moved to Denver from Selma, Alabama how much more the path of the sun each day lay down toward the southern horizon. We're only 506 miles north of Selma.

The figure 8 pattern tells us an important thing about the Earth. It's not on the level. What I mean is that the axis of rotation is not straight up and down in respect to the sun. We're tilted.

That's what causes the seasons. The sun's light hits us at a different slant at different parts of the globe. That spreads the heating sunlight out more in some places and concentrates it at others.

The only part of the globe where the sun is ever directly overhead is at the equator, and then only twice a year, solar noon on the equinoxes. As you travel further and further north, the sun "lays down further and further to the south. Notice that my analemma never crossed the nail and it's always on the north side. Above the Arctic Circle, there are times when the sun never sets. It just rides around the horizon. The Arctic Circle isn't fixed but it's currently a little north of 66° latitude.

The same kind of thing happens in the southern hemisphere except the path of the sun slants to the north. That means that, if you build a sundial, you have to take where you are on the globe into account. The analemma was once a very important tool for that reason. The width of the loops of the analemma provides the equation of time that allows a sundial maker to fine-tune their sundials so that they give accurate time.

You can also see the Earth's tilt at night. The path of the sun follows a straight band across the sky called the "ecliptic". It defined a flat platter extending out from the sun. All the visible planets, including us, and the moon "roll" around the platter like marbles on a dinner plate. 

It's tight. Everything stays within about 8° above or below the ecliptic  you can see it at night because that's where the band of constellations called "the zodiac" are.

Go out and find those constellations. If you're not familiar with them, download the Stellarium app. It shows where they are in your sky. You'll see that, although they follow the celestial equator in the night sky (the day sky, too, they're just not bright enough to be seen with the sun), you won't see them around the horizon. They'll be in a band tilting up into the sky unless it's the equinox and you're at the equator.

I could calculate the tilt from my analemma if I could have managed to keep it level and strictly oriented all year. Maybe you could manage that.

By the way, the Wikipedia has a cool article on the analemma with time elapsed photographs of the sun in the sky tracing an analemma and explanations of how it has been used as an astronomer's tool.

We can know a lot about Earth's rotation from direct observation of the sky. What about our orbit around the sun? Well, we already know how long it takes us to get around the sun. What about the shape of the orbit and it's radius?

That'll be in the next blog so stay tuned.

You can learn a lot about us by looking at the sky. The fact that there even is an "us" has a lot to do with where we are in the solar system and in our Milky Way Galaxy. If you haven't already installed Stellarium on your phone, go ahead. It's free. And go out and explore the sky. 


Thursday, January 9, 2020

Orbits

Before we look at what's up there, we need to understand how what's up there works. The same forces that operate down here drive what's up there. There's a problem though. An orbiting planet isn't the same thing as a mass whirling around on a string. For one thing, the string constrains the motion of a whirling object to a strict circle while gravity does not.

Frankly, it's hard to study orbital mechanics on Earth. Henry Cavendish finally nailed down the force of gravity, Newton's universal gravity constant, 71 years after Newton's death. He did it by suspending two very heavy objects at the opposite ends of a rod by a hanging, thin rod, and setting it oscillating. Then he did it again, setting a massive object near one of the hanging weights (the setup is called a torsion pendulum and its exquisitely sensitive.) The difference in the periods of oscillation gave him the information he needed to calculate the gravitation constant.

Other than that, have you ever tried to bring a planet into your bedroom?

Barring that, I have my gravity simulator (you saw it in the blog "Something about mass") and, although it isn't a perfect model of planetary orbits, it's surprisingly good.

First, let me point out that Newton learned more about mechanics by looking at the planets than by watching apples drop off a tree. As for the value of the acceleration of an object under the influence of gravity, Galileo had already done that work. Newton's first law of mechanics is actually Galileo's law of uniform motion. When Newton said, "If I have seen further, it is by standing on the shoulders of giants," he meant it quite literally. Newton was not a man given to bouts of humility.

Kepler's laws of orbital mechanics came before Newton. Newton's job was to tie it all together and figure out how the mechanics of planets was the same as the mechanics of an ox cart or that of a falling apple. So let's play with planets.


[Small ball around large ball]

The two balls are steel, so they're the same density. They don't orbit for long because they're close and exert more "gravity" and, more, because the model creates a lot more friction than the vacuum of space.

Newton deduced that the force of gravity between two masses increased with the product of the two masses and decreased with the square of the distances between them. He threw in a "universal gravitational constant" that makes the units and scaling work out. That's what Cavendish figured out years later.

The shape of the orbit is clearer when a smaller ball (BB) is used.


[Tiny ball orbiting around large ball]

Kepler worked out the shape of planetary orbits from the massive number of precise observations made by his mentor, Tycho Brahe. His first of three laws stated that planets move in elliptical orbits. Notice that, regardless how I start these balls rolling, they end up in elliptical orbits. That's not a result of the way the fabric is stretched. I tried to make sure that it was stretched evenly in the embroidery hoop.

For planets, as well as balls in the gravity simulator, the large ball is at one of the focuses of the small Ball's elliptical orbit.

Also, watch the way the ball speeds up in those tight turns. Kepler's second law states that the planets sweep out equal areas in equal times. That means that, when the planet is farther from the sun, it moves slower. 

His third law is harder to see on the simulator, but it says that, of two planets, the one orbiting further from the sun will have been a longer period (year) than the other.


[Balls of equal size]

When two balls of equal size are on the simulator, they orbit each other. Actually, that's true of all the orbits. It's just that, when the difference is large, it's hard to see the larger ball move. Even in space, planets and stars orbit around common centers. For instance, binary stars sling each other around a common center.


[Three balls of different density]

Here, I roll a small steel ball, an aluminum ball, and a wooden ball around the large steel ball. You probably could have guessed that the less dense wooden ball would orbit the longest. Also, notice that it's orbit is less elliptical.


[Tiny ball with different forces]

Here, I tried to roll the ball at different speeds (including, off the simulator). Notice the shapes of the paths. Even the ball's path at "escape velocity" is curved.

In fact, not all orbiting bodies take an elliptical orbit, but they do all follow conic curves. The Earth's orbit is almost, but not quite, circular. On the other hand, comets and other "space junk" may just graze the gravitational field of the sun on a hyperbolic curve, or loop around once on a parabolic path, and never return.


[Swarms]

A collection of BBs make a nice little solar system. The really fascinating thing is when they are going in opposite directions.


[Two swarms]

Notice how they end up all going in the same direction! Ever wonder why all the planets orbit the sun in the same direction? Remember that, not only the sun is pulling them, but they are also pulling each other. It turns out that star systems are self-organizing.

The early history of Earth was violent. Collisions were common in the early solar system. In fact, our moon was probably the result of such a collision, a chunk knocked out of our planet by a traveling piece of space debris. Over time, such collisions became rarer. You've just seen one of the reasons why.

The gravity simulator is fun and offers a lot of possibilities for studying gravity and orbital mechanics. For instance, you could easily build a large version using a hula-hoop...or a trampoline! You might also check out different materials for the membrane. Plastic food wrap causes less friction.


Monday, November 25, 2019

Astronomy references

I've collected a considerable library of references over the years. Many of them are stored on my phone. The first three below are great places for ideas for projects on any of the sciences.

Science Buddies


Aimed toward school kids developing science projects, the many ideas on this website are useful for any explorer of the sciences.

Science Notebook


I've mentioned this site before. One cool thing about it is their repository of manuals from old science kits, back when they were not lame.

MIT Opencourseware


All of MIT's course materials including many of the textbooks, lecture notes, lecture videos, and even a few lab guides.

Olcott, William (1907) A Field Book of the Stars (available in various forms at the Gutenberg Project site). 

A nice thing about old do-it-yourself books is that they were printed back when people had to use what they had at hand to do things. You won't find out anything about black holes but there is all kinds of observational information.

NASA Imagine the Universe Dictionary online at https://imagine.gsfc.nasa.gov/resources/dictionary.html useful for figuring out what you're talking about and how to talk about it.

Astronomy Merit Badge Handbook

What do you need to know to prove you know the Stars? Ask the Boy Scouts! You can look at their merit badge guides at https://www.scouting.org/programs/scouts-bsa/advancement-and-awards/merit-badges

Astronomy Wikibook

The Wikipedia offers textbooks on many topics including astronomy at https://en.wikibooks.org/wiki/Main_Page

BEST-NGC.XLS

Astro-Tom provided a list of New General Catalog objects and their observational data at http://www.astro-tom.com/technical_data/files_to_download.htm . It's an Excel spreadsheet so you'll need a spreadsheet app that's compatible with Excel. 

Binocular Astronomy

Tonkin, Stephen (2007) Binocular Astronomy, Springer-Verlag, London. A guide to exactly what I'll be doing in 2020 - low power astronomical observation.

Brightstars.xls

Also from Astro-Tom (see BEST-NGC.XLS above for the link), a list of data for the brightest stars in the sky.

Cambridge Illustrated Dictionary of Astronomy

Mutton, Jacqueline (2007) Cambridge University Press. 

A beautifully Illustrated dictionary of astronomical terms and bodies.

Dictionary of Geophysics, Astrophysics, and Astronomy

Matzner, Richard A. Ed.(2001) CRC Press. Articles by 52 acknowledged experts in the field.

Geometry_of_science.xls (https://www.csun.edu/science/ref/spreadsheets/xls/) among many useful Excel spreadsheets, this one has a section of the intensity of light on the planets.

HERSCH.xls (http://www.astro-tom.com/technical_data/files_to_download.htm) another spreadsheet from Astro-Tom. It's the Herschel 400 listing.

Isaac Asimov's Guide to Earth and Space

Asimov, Isaac (1991) Fawcett Books
A lot of astronomical, physical, and geological information from the master of scientific popularization.

And more spreadsheets from Astro-Tom providing much observational data.

mesr-mas.xls

messier-plus.xls

NEBULA.XLS

next-100.xls

OBSRVTRY.XLS

OCULAR.XLS

planetary_data.xls

planets.XLS

solar_system_calc.xls

STARS.XLS

TELESCOP.XLS

TRAKSAT.XLS


Your New Telescope: The Good, The Bad, and the Ugly

This is a page by Tom Koonce on the Astro-Tom website (http://www.astro-tom.com/download/presentations/new_telescope.pdf).

Physics - From Stargazers to Starships

Stern, David P.  And Alex A. Zaliznyak (2023) CK-12. 

This CK-12 textbook focuses on the physics of space, written at a beginner's level and in a very readable style. How did astronomy get started and how did it get to where it is today?

Schaum's Outline: Astronomy

Palen, Stacey (2002) Schaum's Outlines: Astronomy. McGraw Hill.

As always, Schaum's Outlines are great study resources, dense with information, examples and problems, worked and unworked.

Taki's 8.5 Magnitude Star Atlas

Toshimi Taki (2006) Can be downloaded from Taki's website with lots of other information here http://www.takitoshimi.shop/

MIT 12.409 Hands-On Astronomy


Star Date Online

This website is great for keeping up with what's going on I'm the sky and in astronomy.

A Simple Guide to Backyard Astronomy Using Binoculars or a Small Telescope

Beigel, Carol (2007) available at www.carolrpt.com/astroguide.htm (accessed 10/17/19)

This is a nicely packaged reference for the amateur astronomer.

Night Sky - A Falcon Field Guide

Nigro, Nicholas (2012) Morris Book Publishing. 

All the Falcon Guides are fairly complete, portable, and inexpensive. Not a lot of technical information, but that's why all the other references.

Sky Watching. The Teaching Company
Alex Filippenko (2011)

I highly recommend the lecture series (buy it when it's on sale). It's beautiful and packed with information from someone who knows what they're talking about, but the course guide that comes with the videos should definitely go with you into the field.

A Visual Guide to the Universe
The Teaching Company
David M. Meyer (2014)

A gorgeous guide to the Universe through the lenses of our orbiting telescopes.

Understanding the Universe: An Introduction to Astronomy
The Teaching Company
Alex Filippenko (2007)

The astronomy course from the teaching company. It's a great start to you career in astronomy.

I'm all about getting out of the house to learn about the world, but the best place to start is in the library...yours or the one down the street. Get a preview before you hit the trail.

Friday, November 22, 2019

Astronomy tools

Again, I try to keep my equipment portable and inexpensive. You won't get clear, crisp photos of the crab nebula with my setup, but you might be surprised what you can do with it.

As always, my central and most expensive piece of equipment is my computer, currently a…..

Motorola Moto E5 Cruise phone

In preparation for excursions into astronomy next year, my phone is packed with camera and astronomy apps and I have loaded my SD card with astronomy field guides.

This phone has 16 gigabytes of internal memory and an added SD card with another 31 gigabytes, plenty for my purposes. It's moderately priced (between $100 and $200 dollar) and it even serves as a phone!

The camera gives nice results with 8 megapixel resolution plus video and will magnify to 8 times (though the result at 8x is grainy).

Camera hardware

I supplement my phone's camera with a fanny pack full of hardware that I've collected over time including phone clamps, assorted tripods from  desk-size to an eight foot tall tripod. I also have an assortment of standard quarter inch screws, nuts, and bolts that I can use to attach the phone-camera to hardware that isn't particularly for cameras, like Erector set parts and pipe clamps.

I've also collected microscopic, telescopic, fish-eye, etc. lenses and eyepiece adapters for my assorted binoculars, monoculars, and rifle scopes. All this "stuff" is inexpensive at places like American Science and Surplus, Home Science Tools, and numerous other suppliers that cater to the backyard scientist.

The key...be a packrat.

Open Camera

Mark Harman


The camera in my Android phone isn't all purpose but camera apps are inexpensive or free and they all have their special features. The camera that came with my phone is great for point-and-click photography, but there aren't many bells and whistles. 

The Open Camera app allow quick series of shots and allows for time/date/location stamped photos. It also provides slow motion and Bluetooth shutter release capabilities.

Snail Camera


The Snail Camera app is very flexible with lots of color, contrast, etc. settings. Practically anything you can do with a DSLR camera except change lenses (but see the mention of my packrattery above.)

It even lets you take multiple and extended exposures. The timed exposure is important for astronomy because you will be trying to capture some dim images.

Note: astronomy requires a remote shutter release and stable mount. With telephotography, barely touching the camera will move it quite enough to lose the object you're photographing. The tripod should also have fine adjustments because aiming a phone camera with a telephoto lens is hard enough.

USB Camera app

Infinitegra Inc.

This app, plus a USB to microUSB plug converter lets me connect other cameras and webcams to my Android. This doesn't work with some smartphones (it requires the phone to be otg, On The Go, enabled) but it's had no problem with my Motorola. If you wonder if you're phone has the right software, there are free apps that you can download (if you have an Android phone, the Google Play store will have what you need) that will test for otg.

Heavens Above

Chris Peat and Jen's Tinz


This app will keep you up to date on things happening in the sky including satellites and their tricks, like Iridium flares.

Stellarium


My favorite astronomy app, the Stellarium is a planetarium you carry with you on your phone. There are also versions for laptops and desktop computers. It will orient you to where you should look in the sky and, like big planetariums, it's loaded with educational extras.

Night Sky Guide

Shiny Objects LLC

This is a no-frills table of observable objects and where to observe them, plus an observation log that you can save as a csv (comma separated values) file.

SkyWiki


Sky map, calendar, astronomy news, image gallery, compass, and periscope all rolled into one package. (The periscope tells you where the sun, moon, and planets are right now, indoors or outside.)

Atmospheric


Atmospheric conditions are important for skywatching. Pollution, dust or light, can create a beautiful sunset, but they can also wreck an astronomical outing. This app provides a summary of weather and predictions for your area.

That's a lot of apps but they will all fit on one phone and are all free or inexpensive. They are programmed for an Android phone but many have versions for other kinds of phones, tablets, and laptops. If not, there are probably similar products that you can find with a little Internet search.

That's my lineup, Track down yours and join me for a year of sky watching and physics.

If you find references or equipment that you just can't do without, add a comment to the blog to let us know about it.